How To Install Multiple GitHub Self-Hosted Runners On The Same Machine
How to set up multiple GitHub Actions self-hosted runners on the same machine so multiple repositories can build using a free GitHub account.

Have a free GitHub account and want to use a self-hosted runner for more than one repo?
You have a free GitHub account and want to use the same machine (like a VPS, or a VM, or a dedicated host) to perform your CI/CD jobs. Unfortunately, unless you pay GitHub and create an Organization you won't be able to configure one runner on multiple repos.

Fortunately, there is an easy solution:
You can install multiple runners on the same machine by installing each runner in its own folder
In this example, there are two runners on the machine, one which builds and deploys my portfolio website, and one for this blog:
/var/actions-runners# tree -L 1
.
├── corey-regan.ca
└── corey-regan.ca-blog
Configure the self-hosted runner on your machine
Pick an installation directory
Choose where on your machine to store your runners, I chose /var/actions-runners.
I'll create the subdirectories that will contain our two runners, corey-regan.ca and corey-regan.ca-blog, name them appropriately for your needs.
We will then change its owner and apply a sticky bit to the group so that subsequently created folders and files are always owned by the gh-runner group.
mkdir -p \
    /var/actions-runners/corey-regan.ca \
    /var/actions-runners/corey-regan.ca-blog
Create a new user & group for the runner
Create a new user and group for the runners, using the -r flag to create a system account will have no password set,
no home directory, and its shell set to /usr/sbin/nologin, which should reduce their permissions to a minimal level necessary.
This is important because the runner will be exposed to the internet, so we should attempt to mitigate this potential attack vector.
sudo groupadd -r gh-runner
sudo useradd -r -g gh-runner -s /sbin/nologin gh-runner
Apply directory permissions
We'll make the gh-runner user & group the owner of the installation directory,
and configure it so that subsequent files/folders are always owned by gh-runner by applying a sticky bit to the group ownership.
chown -R gh-runner:gh-runner /var/actions-runners
chmod g+s /var/actions-runner
cd /var/actions-runners
You can see the sticky bit applied to the directory, look for the "S" in the listed permissions of the current directory.
/var/actions-runners$ ls -lsah
total 16K
4.0K drwxr-Sr-x  4 gh-runner gh-runner 4.0K May  5 12:29 .
4.0K drwxr-xr-x 16 gh-runner gh-runner 4.0K May  5 11:15 ..
4.0K drwxr-xr-x  2 gh-runner gh-runner 4.0K May  5 11:45 corey-regan.ca
4.0K drwxr-xr-x  5 gh-runner gh-runner 4.0K May  5 12:18 corey-regan.ca-blog
Personalized instructions from GitHub
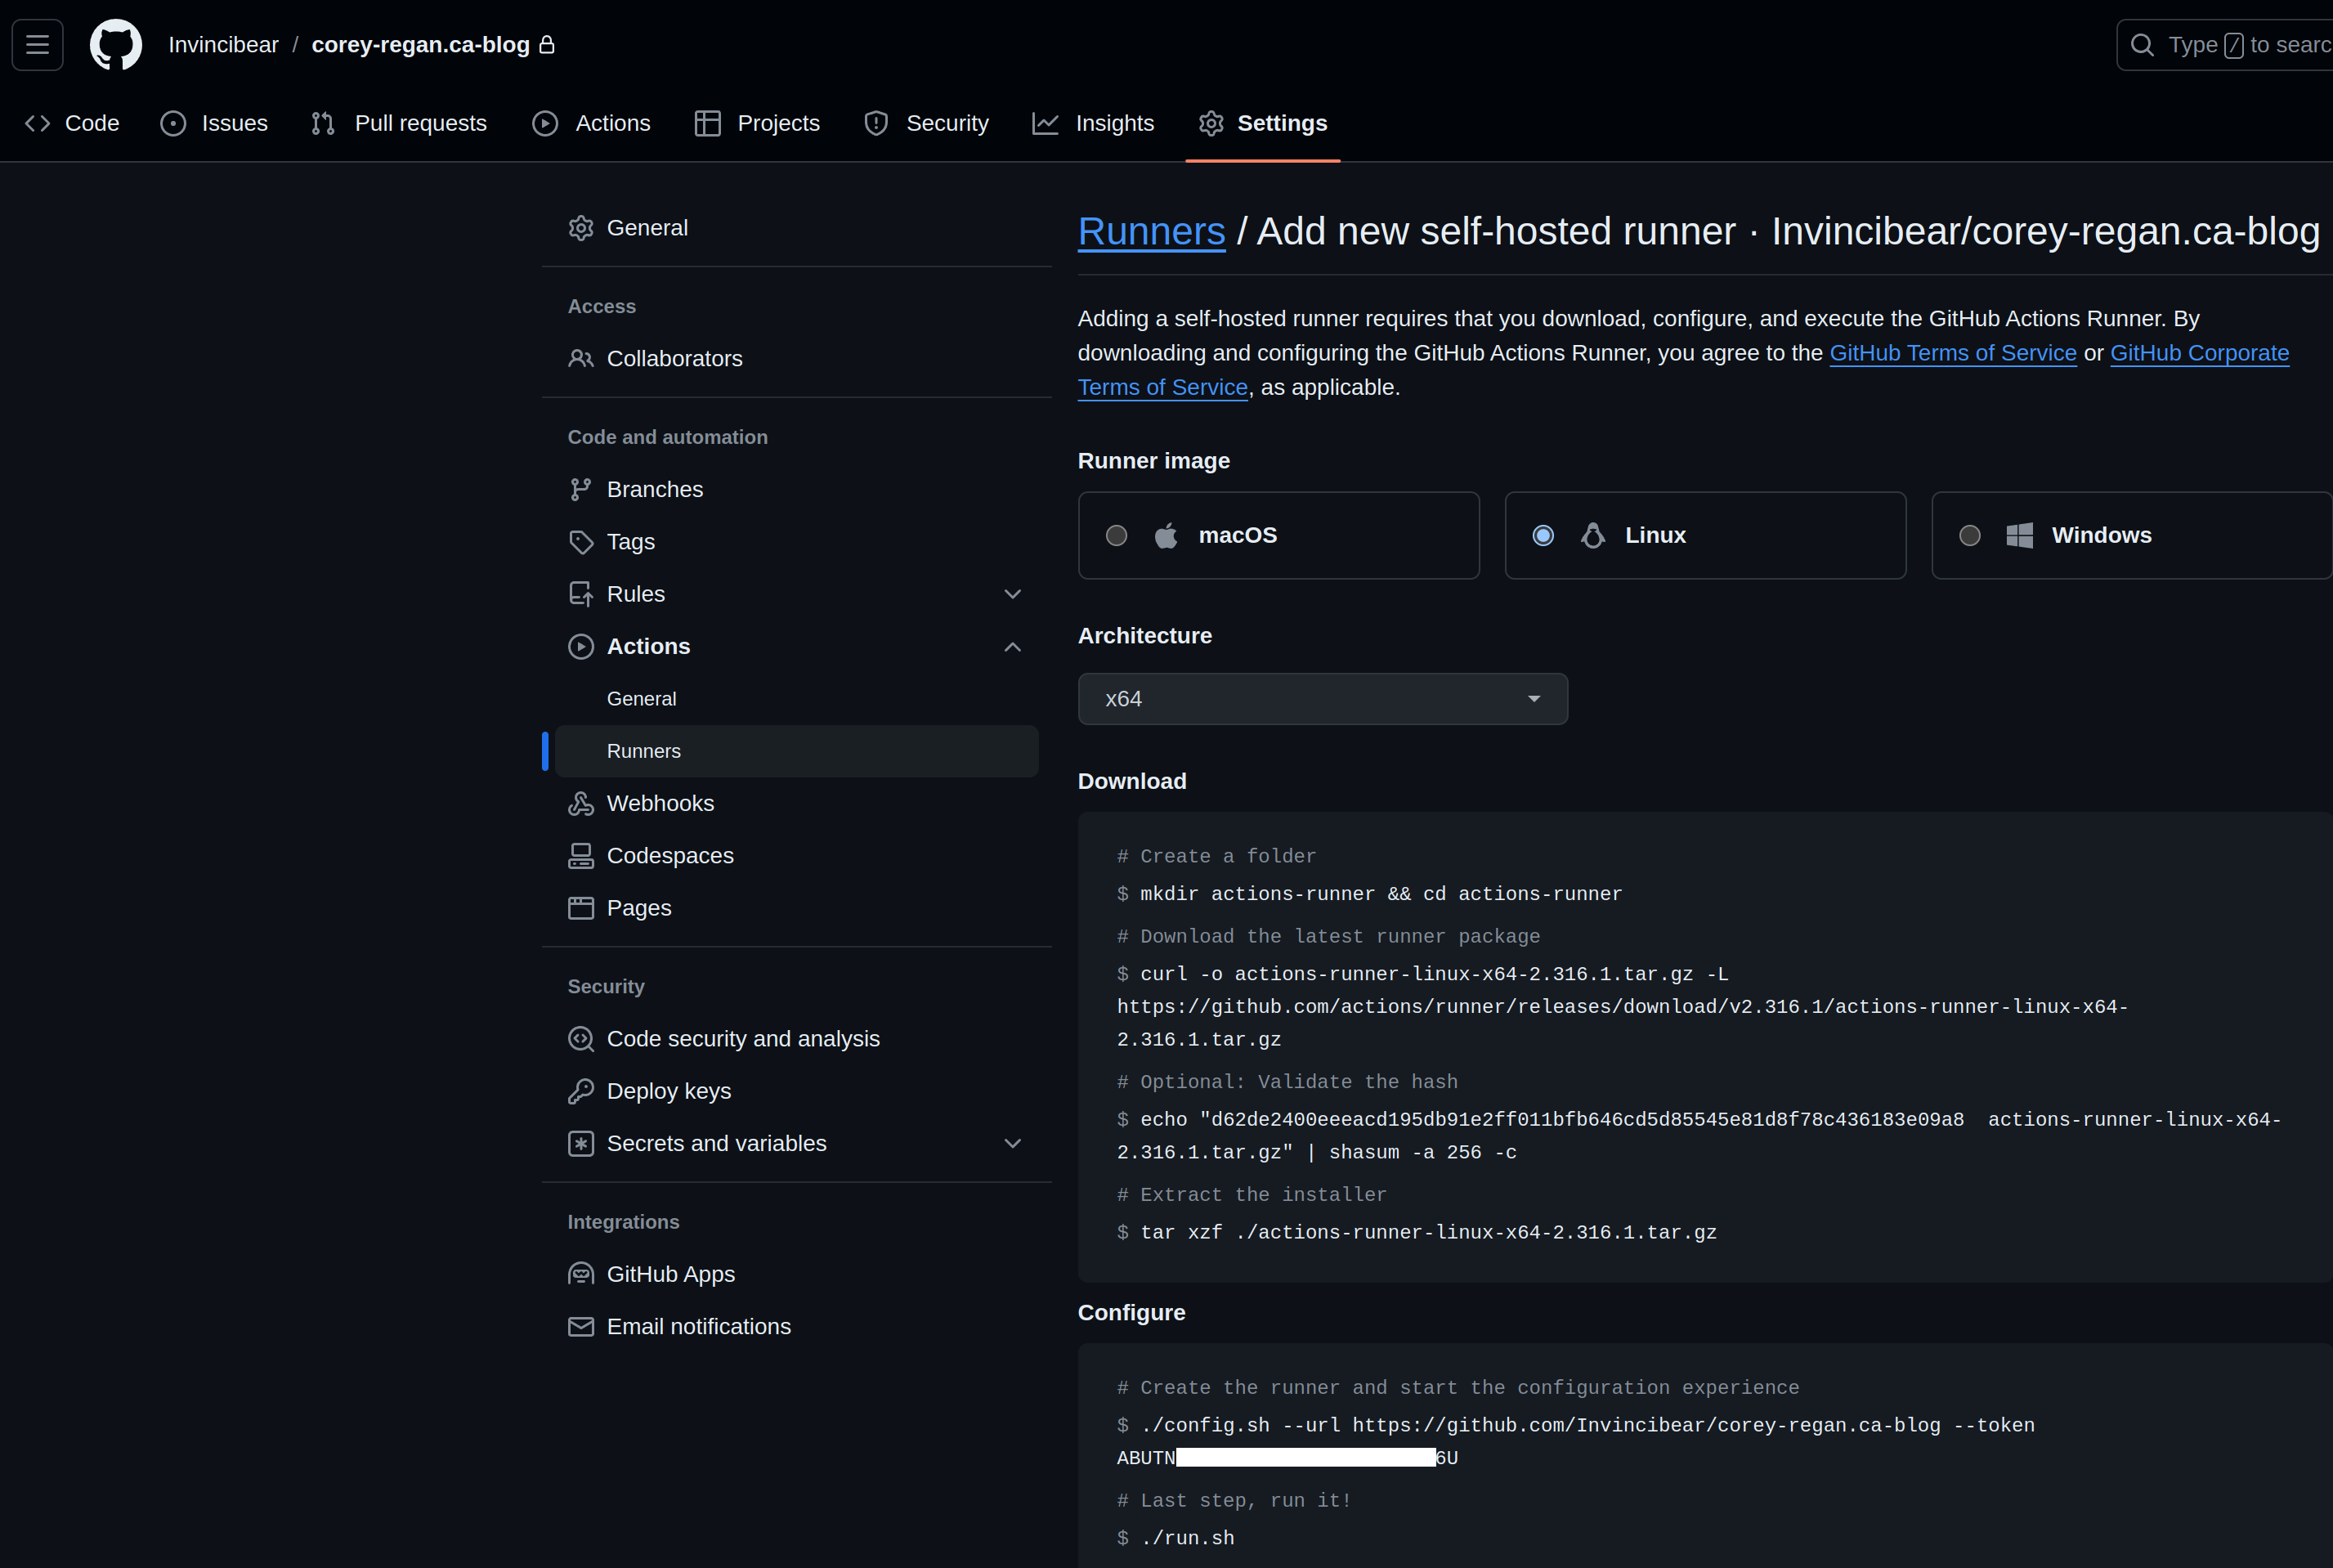
You can get personalized installation instructions from GitHub which includes a download link for the latest version of the runner software, as well as a secret token to securely connect the runner to GitHub.
Visit your GitHub repository and click on Settings. In the left nav bar, expand Actions and click on Runners.
Click on the New self-hosted runner button in the top-right of the Runners page.
Select the appropriate OS and architecture of the machine the runner will be installed on to generate the personalized installation instructions.
At this point, you should have:
- Downloaded the runner installation package
- Extracted the installer
- Installed the runner
Runner-as-a-service
We can configure the runner as a service to survive reboots and always start with the machine, configured to run as gh-runner:
sudo ./svc.sh install gh-runner

Creating launch runner in /etc/systemd/system/actions.runner.Invincibear-corey-regan.ca-blog.corey-regan.ca-blog.service
Run as user: gh-runner
Run as uid: 1009
gid: 1009
Created symlink /etc/systemd/system/multi-user.target.wants/actions.runner.Invincibear-corey-regan.ca-blog.corey-regan.ca-blog.service → /etc/systemd/system/actions.runner.Invincibear-corey-regan.ca-blog.corey-regan.ca-blog.service.
We also need to start the service for the first time:
sudo ./svc.sh start

/etc/systemd/system/actions.runner.Invincibear-corey-regan.ca-blog.corey-regan.ca-blog.service
● actions.runner.Invincibear-corey-regan.ca-blog.corey-regan.ca-blog.service - GitHub Actions Runner (Invincibear-corey-regan.ca-blog.corey-regan.ca-blog)
     Loaded: loaded (/etc/systemd/system/actions.runner.Invincibear-corey-regan.ca-blog.corey-regan.ca-blog.service; enabled; vendor preset: enabled)
     Active: active (running) since Sun 2024-05-05 13:36:19 PDT; 23ms ago
   Main PID: 1626824 (runsvc.sh)
      Tasks: 2 (limit: 9263)
     Memory: 324.0K
     CGroup: /system.slice/actions.runner.Invincibear-corey-regan.ca-blog.corey-regan.ca-blog.service
             ├─1626824 /bin/bash /var/actions-runners/corey-regan.ca-blog/runsvc.sh
             └─1626835 ./externals/node16/bin/node ./bin/RunnerService.js
We can verify the new runner connected to GitHub by refreshing the Runners page:

And we can also confirm this by querying the status of the runner's service:
sudo ./svc.sh status

/etc/systemd/system/actions.runner.Invincibear-corey-regan.ca-blog.corey-regan.ca-blog.service
● actions.runner.Invincibear-corey-regan.ca-blog.corey-regan.ca-blog.service - GitHub Actions Runner (Invincibear-corey-regan.ca-blog.corey-regan.ca-blog)
     Loaded: loaded (/etc/systemd/system/actions.runner.Invincibear-corey-regan.ca-blog.corey-regan.ca-blog.service; enabled; vendor preset: enabled)
     Active: active (running) since Sun 2024-05-05 13:36:19 PDT; 7s ago
   Main PID: 1626824 (runsvc.sh)
      Tasks: 37 (limit: 9263)
     Memory: 69.7M
     CGroup: /system.slice/actions.runner.Invincibear-corey-regan.ca-blog.corey-regan.ca-blog.service
             ├─1626824 /bin/bash /var/actions-runners/corey-regan.ca-blog/runsvc.sh
             ├─1626835 ./externals/node16/bin/node ./bin/RunnerService.js
             ├─1626852 /var/actions-runners/corey-regan.ca-blog/bin/Runner.Listener run --startuptype service
             └─1626878 /var/actions-runners/corey-regan.ca-blog/bin/Runner.Worker spawnclient 106 109
Configure your github-actions file
Congrats, you now have a self-hosted runner that GitHub can farm builds to! There is one final step though, you need to configure your workflows to use the new runner. By default, GitHub actions run on GitHub-provided servers. Free accounts have a couple-thousand hours per month of free runtime for private repos, and unlimited hours for public repos. Pro accounts get more hours, but that may be insufficient depending on your bespoke needs.
Self-hosted runners have no such limitations, and have the advantage of having access to other resources on the system. Your runner can execute other scripts on your machine, enabling complex tasks not easily possible on GitHub-hosted runners.
Fortunately, it only takes one line to add to your YAML to instruct GitHub to use your self-hosted runner:
runs-on: self-hosted
name: Deploy blog

on:
  push:
    branches:
      - main

jobs:
  build_and_push_image:
    name:            Build and push image to GHCR.io
    runs-on:         self-hosted
    timeout-minutes: 10